
Get in touch
Stay informed
Receive monthly updates on trends, products and growth insights in your inbox.






Can you build a digital storefront before your lunch break is over? Sam Palfreyman, Principal Solutions Engineer, puts commercetools for Builders to the test, using AI coding tools to model products, create a storefront, add checkout and turn a blank project into a working ecommerce experience.
As modern LLMs are trained on public data, the decision to make our technical documentation accessible and easy to consume, along with commercetools’ API-first, modern open architecture, has paid off big time. The reason: AI has a baked-in understanding of how to work with the commercetools Sphere platform, and can easily configure, extend and customize it.
Then comes the next step: Our new commercetools for Builders tooling takes that underlying understanding of commercetools and supercharges it with a set of instructions and tools that give your AI coding systems guidance, tools and best practices. This ensures your AI engineering efforts get the best possible results when working with commercetools.
So, how does this work in practice? In this post, I’ll walk you through taking a fresh commercetools project and turning it into a transactional site from a set of products in Excel (a worrying number of companies still manage their products in spreadsheets) to a transactional site — in about an hour.
As we are starting completely from scratch, the first step for a not-yet commercetools customer is to sign up for a free trial. As commercetools is a truly cloud-native, multi-tenant SaaS solution, a project can be ready for use almost instantly.
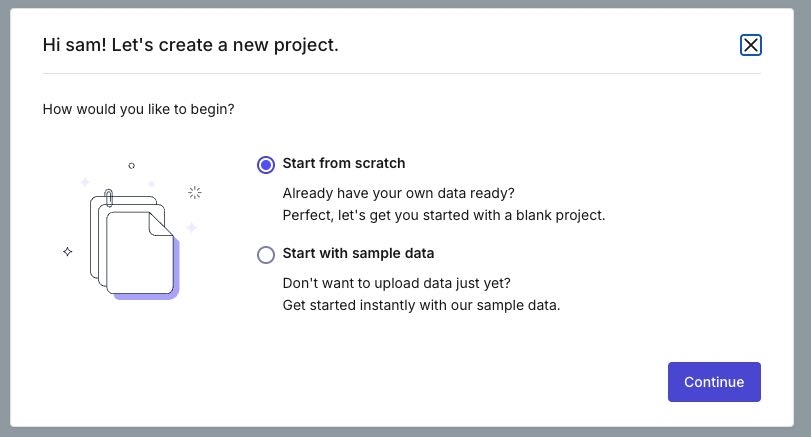
When signing up for a free trial, you’re given two options: One, start from scratch, which means uploading your own data, or two, start with sample data provided by commercetools.
Because I’ve got an existing catalog I want to use, let’s start from scratch.
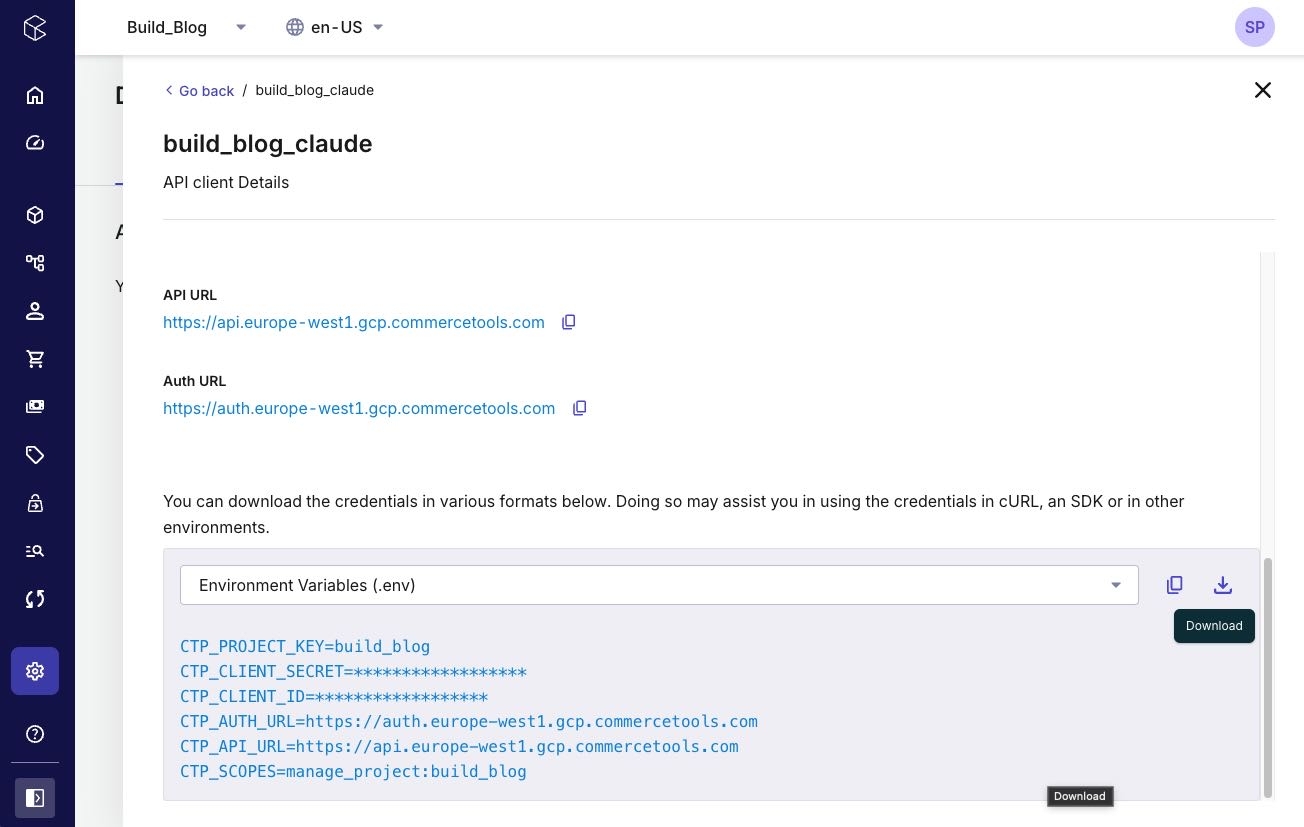
Once the free trial account is created, I need API credentials to allow our AI tools and applications to access the project. I’ll use the admin template to generate the credentials and download them as an .env file, which we can securely store in the project folder.
Our blank commercetools project doesn’t have any product types, products, prices or taxes set up yet. The easiest way to start is using the Smart Data Modeler, an AI-powered assistant that analyzes existing product data and proposes a core product data model within commercetools.
By taking an Excel, JSON or CSV of my products, I can let the Smart Data Modeler and Gemini do the heavy lifting, turning my structured data into commercetools product types.
A short prompt describing the formatting can help the process get on its way:
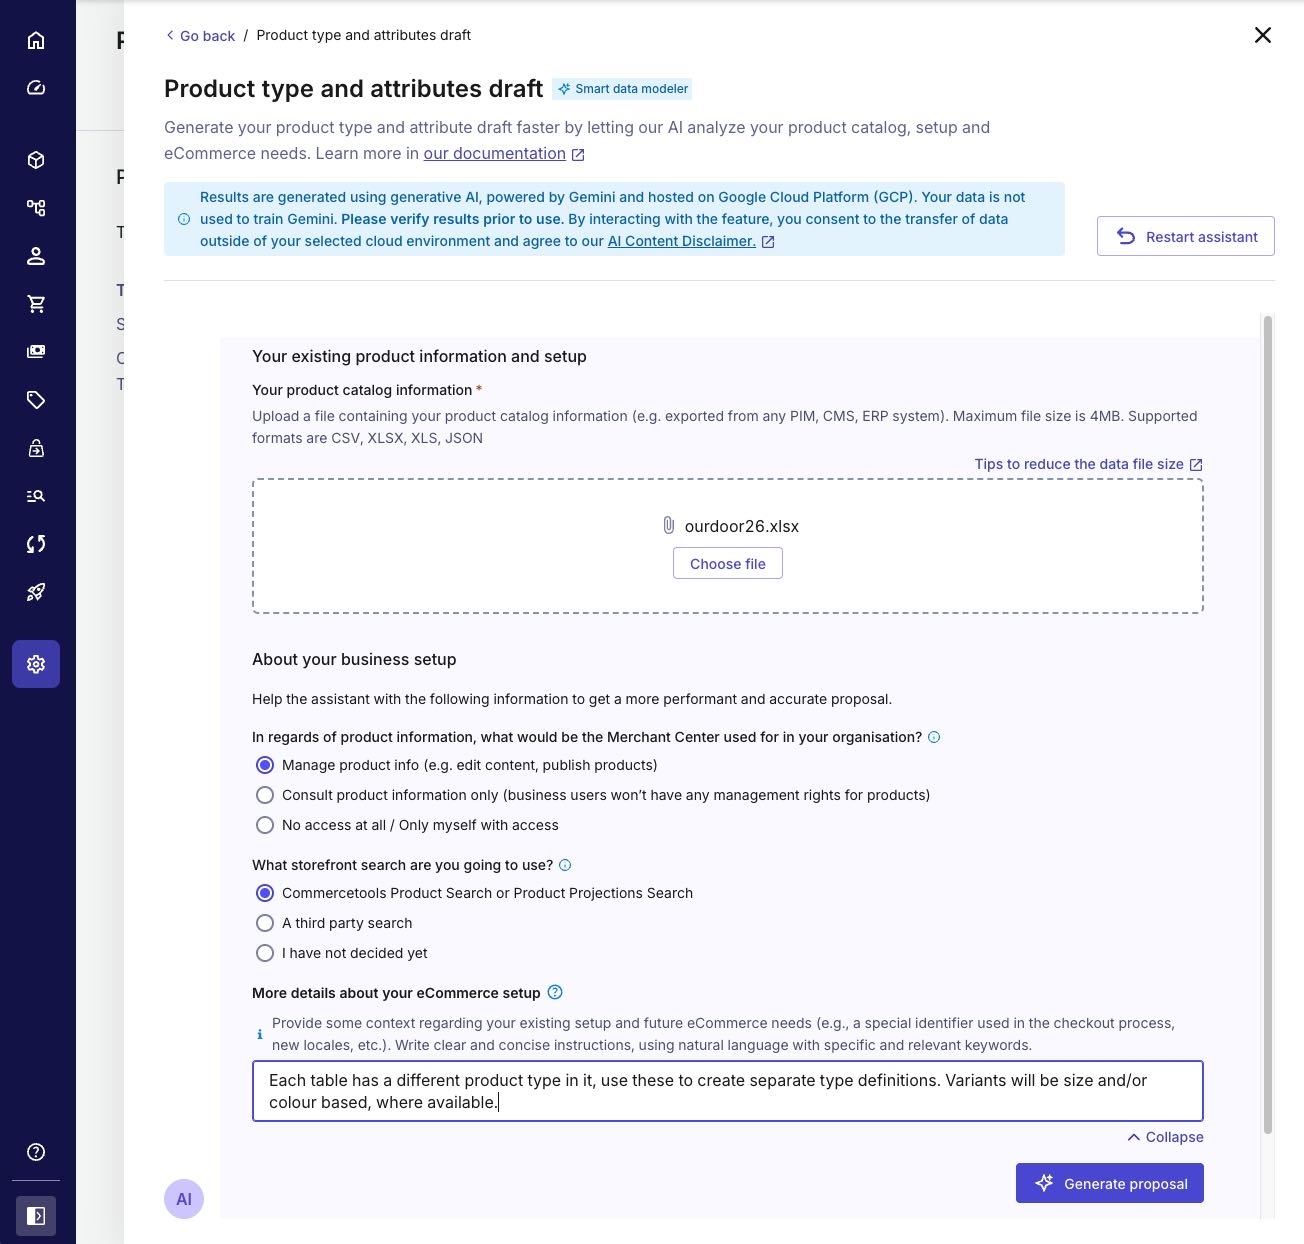
Once completed, I can import these results directly into the project and start creating products. But while this runs, we can proceed with the next step in parallel.
To install commercetools knowledge and tooling into Claude (or your favorite AI coding companion), use the docs here, with all the instructions to install commercetools Skills, connect to the commercetools knowledge MCP and set up a new local MCP server using the environment variables generated earlier.
Hint: For Claude code on desktop, you need to configure the MCP using your claude_desktop_config.json. This lets you run multiple versions of commerce-mcp, each connected to a different project. It should look something like this:
After a restart, it will appear in your connectors list:
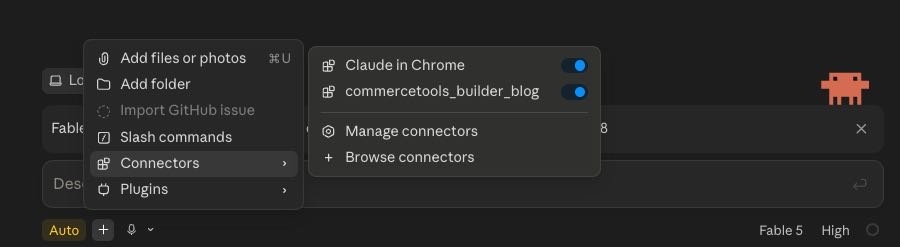
We can also check that we have all the commercetools Skills available so Claude can call on them when needed:
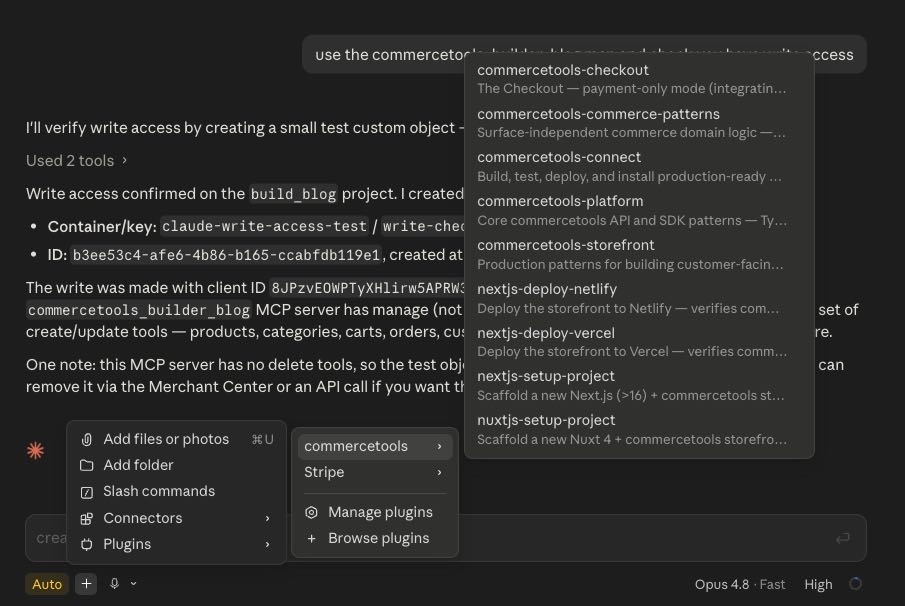
With the project, data model and MCP and skills all ready, it’s time to do some heavy lifting, namely importing products.
Historically, this would be a complex job of mapping attributes between two systems, but as we have created the data model to match our source data, Claude should be able to create a set of products using our Excel file and a simple prompt:
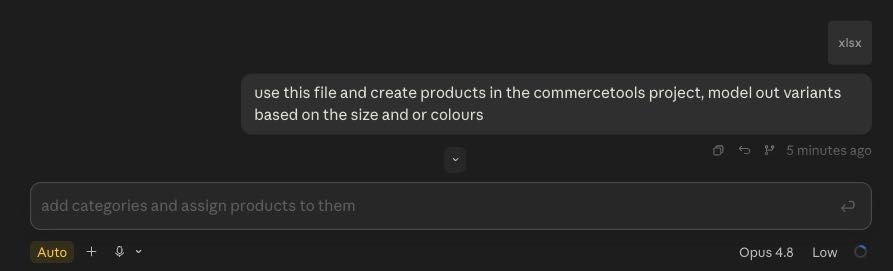
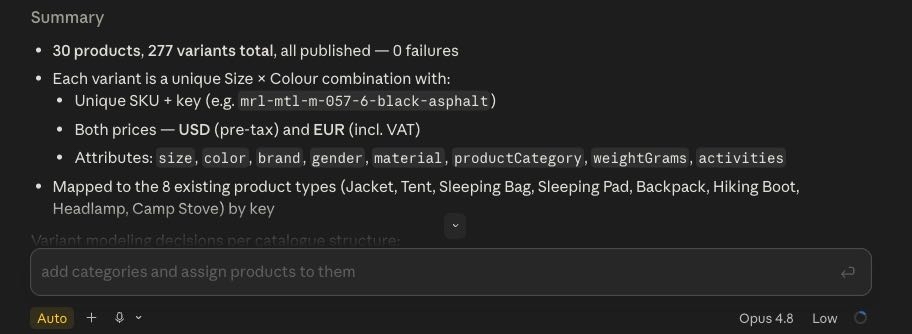
I’ve already got the product images in a CDN, so again I’m going to leverage the AI to work out the mapping of the image file formats and their new SKU data model. But, as with all these steps, we’ll ‘trust but verify’ and check it properly later.
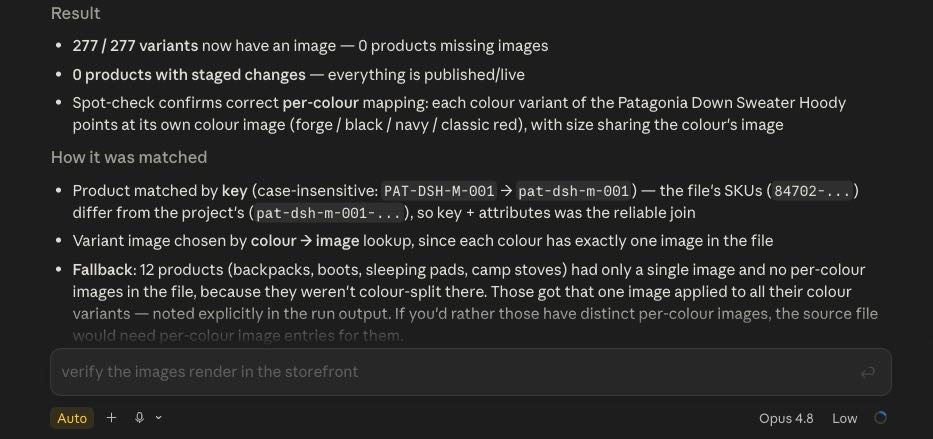
While I’ve taken the basic project setup, there are likely things I’ve missed, so let’s ask Claude to fix that for us. Here’s the prompt I used:
This will pick up any missing attributes we need for tax calculation on the product and project, missing shipping methods and anything else we haven’t set up yet. If we were more organized, we could have described this in a starting design manifest, created it from an existing project or lifted it from one of our live websites.
Now, onto the storefront: the commercetools storefront skill provides Claude with best practices for building a production-ready Next.js storefront. I’m going to switch to Fable 5 (Anthropic’s latest model at the time of writing) as it provides better and faster results at the moment:
After around 15 minutes, we start to get a preview of the site, and Claude starts to validate its code and make decisions:
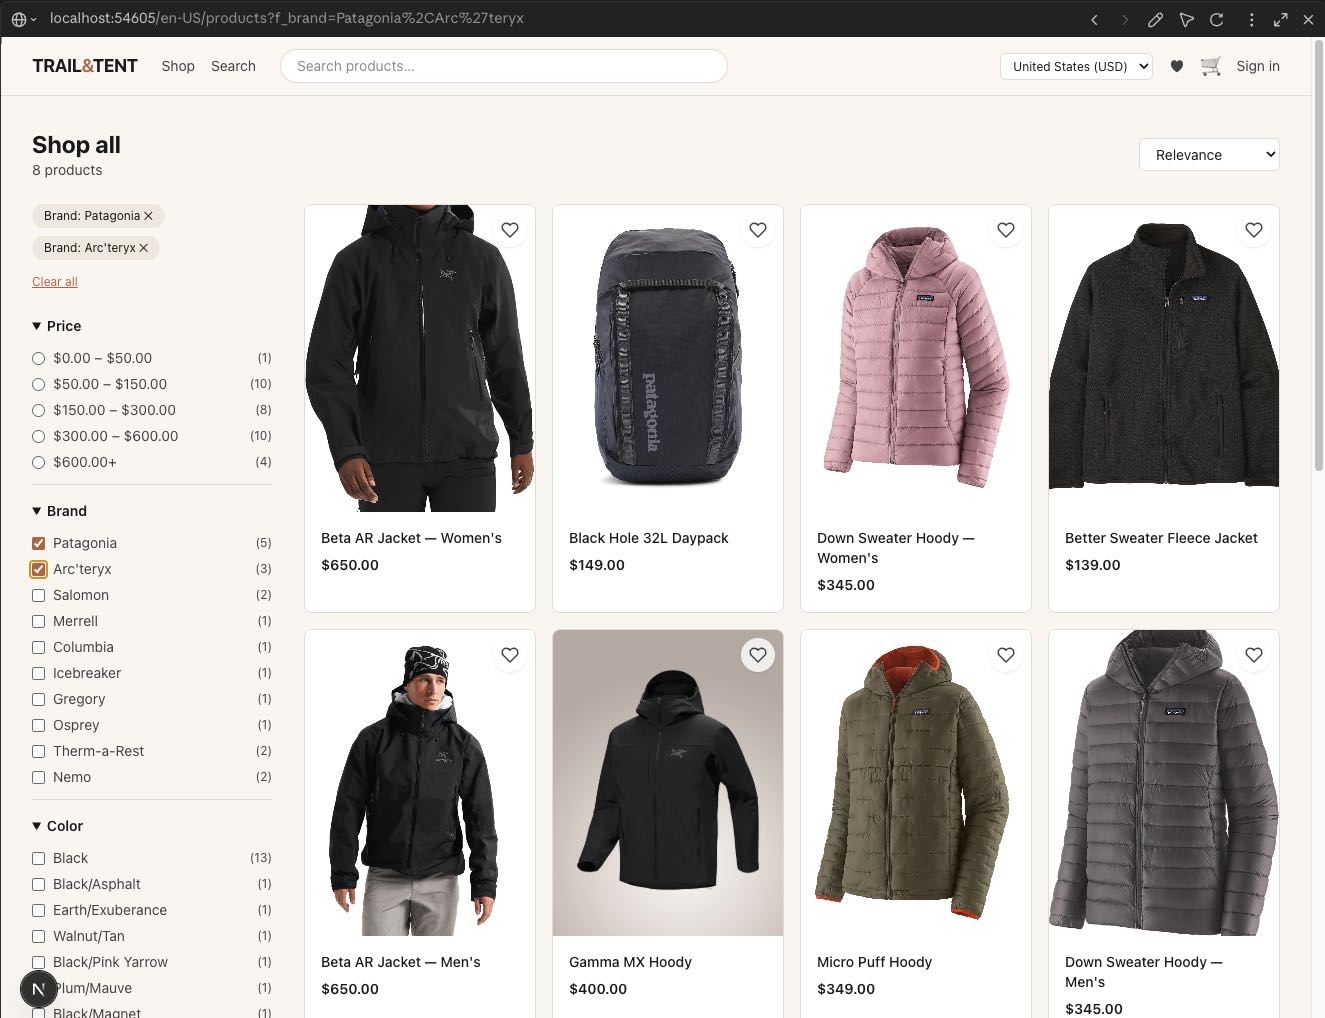
After 20 minutes, we have a running storefront with search, faceted navigation, variants, wishlists and authentication to save that wishlist to a customer.
At the moment, I don’t have a checkout application or a tax engine, but I can always ask Claude to help with that. Also, the storefront is only deployed locally, but the commercetools Skills have given us Vercel and Netlify deploy scripts as part of the build.
We could use the commercetools checkout application to deploy and manage the checkout, but in this project, I’m going to use Stripe’s agent skills to deploy and test Stripe’s embedded checkout:
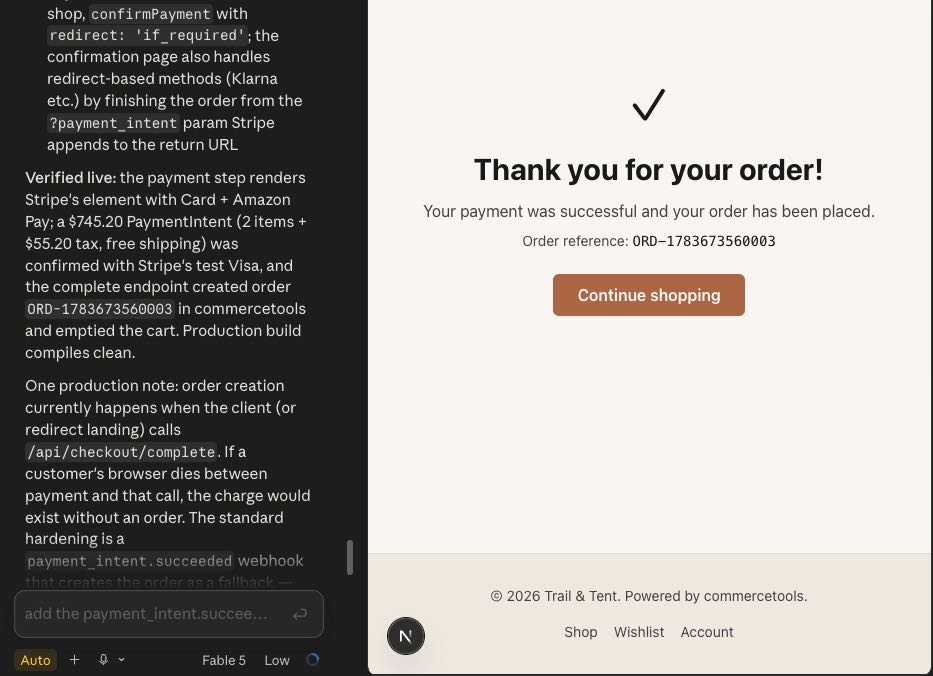
To fix our US tax issue, I ran research using the commercetools knowledge MCP, which provided me with two options:
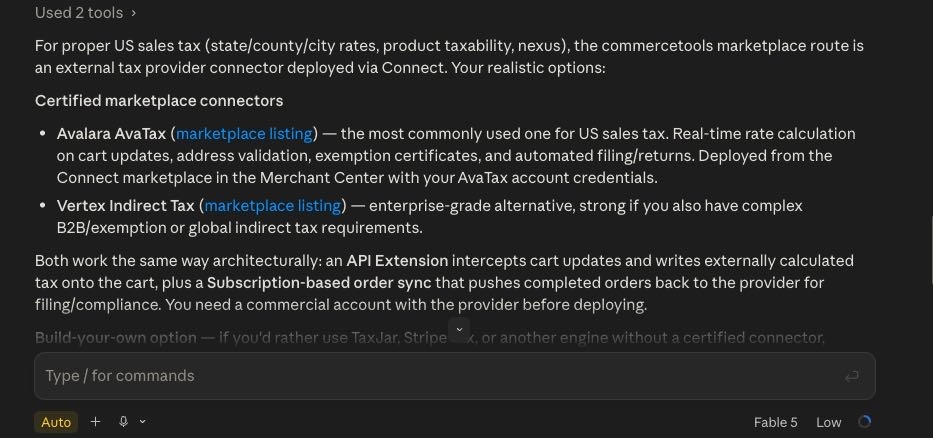
After fixing this issue, it’s time for deployment. We could deploy the storefront to Vercel, Netlify or any other hosting using the /commercetools:nextjs-deploy-netlify skill, but given its current setup, this isn’t a great idea & the skills know that:
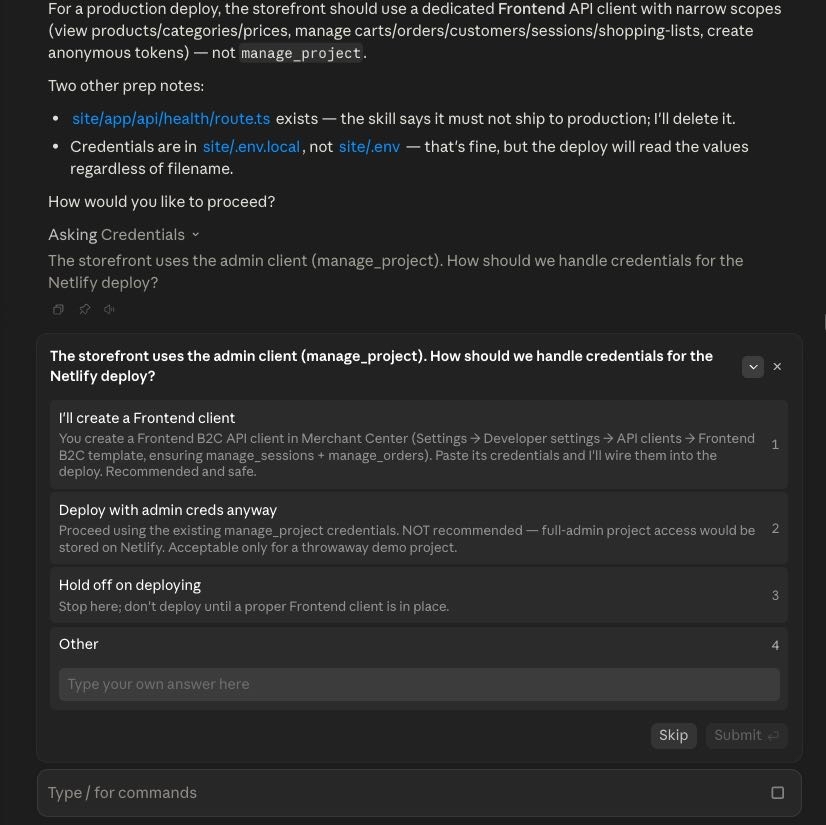
Our API credentials have way too many permissions for public publishing, so my agent is warning me not to deploy with the current configuration. It’s also showing a few recommendations on how to fix the issue.
As I’m coming up on the hour, I’m going to leave it local and keep working on the site and project.
In this blog, we’ve taken around an hour to bootstrap a completely fresh commercetools project with products, prices and taxes, using Claude code and commercetools for Builders. We’ve added everything we need to make a sale, including tax and payments, and we’ve created a Next.js-based frontend that’s ready to be pushed through our test pipeline and published to production.
Next time, we’ll look at how we can go deeper by customizing the Sphere platform with API and Merchant Center extensions, and then deploy them to commercetools Connect.
Try it out for yourself! Start your free trial and build your digital storefront with AI in a few minutes.

Sam has over 15 years of experience as a senior architect and trusted advisor to the world's leading B2B and B2C brands in complex digital programmes from adoption to implementation of eCommerce solutions.
Receive monthly updates on trends, products and growth insights in your inbox.